
Will a Concrete Drill Bit Work on Tile? Your Proven Guide
Yes, a concrete drill bit can work on tile, but it’s not the ideal tool and can easily damage the tile. For best results and to avoid chipping or cracking, it’s highly recommended to use a specialized masonry or tile drill bit designed for brittle materials. While a concrete bit might penetrate the tile, it often does so aggressively, leading to a messy and compromised finish. This guide will walk you through why and what the best alternatives are.
Ever stood there, drill in hand, staring at a beautiful tile and wondering if that robust concrete drill bit you just used for a wall is up to the task? It’s a common question, especially when you’re in the middle of a project and realize you might be missing a specific bit. Drilling into tile can feel a bit intimidating because it’s a material that can chip, crack, or shatter if you use the wrong approach. But don’t worry! We’re going to break down whether that concrete bit is a viable option, what the risks are, and, most importantly, what tools and techniques will give you a clean, professional result every time. Stick around, and we’ll make sure your next tile drilling project is a success.
Contents
Understanding Drill Bits: What’s the Difference?
When you’re working with different materials, the right drill bit is crucial. Think of it like using the right tool for any job – a hammer won’t work well for tightening a screw, and the same logic applies to drilling. Concrete drill bits and tile drill bits are designed with specific materials and drilling actions in mind. Let’s look at what makes them different.
Concrete Drill Bits: Built for Toughness
Concrete drill bits, often called masonry bits, are designed to tackle hard, abrasive materials like concrete, brick, and stone. They typically feature a hardened steel shank and a tip made of tungsten carbide, a material known for its extreme hardness and durability. This tip is usually shaped with a chisel-like point or a spade-like head.
- Material: Hardened steel with a tungsten carbide tip.
- Design: Often features a flute (spiral groove) to help clear dust and debris. The tip is typically aggressive, designed for impact and forceful penetration.
- Best For: Drilling into concrete walls, foundations, brickwork, and hard stone.
- Action: Works best with a hammer drill function, which provides rapid hammering blows along with rotation to break up the material.
Tile Drill Bits: Designed for Precision
Tile drill bits, on the other hand, are engineered for materials that are less forgiving than concrete. Tile, especially ceramic and porcelain, is brittle. Aggressive drilling or hammering can easily cause it to crack or chip. Tile bits are designed to cut smoothly and precisely, minimizing stress on the material.
- Material: Often made with diamond grit, tungsten carbide, or specialized hardened steel.
- Design: The tip is usually spear-shaped or has a rounded carbide head, designed to score and then cut the material rather than shatter it. They don’t typically have aggressive flutes for debris removal in the same way as concrete bits.
- Best For: Drilling into ceramic tile, porcelain tile, glass, and sometimes natural stone like marble or granite.
- Action: Requires a steady, consistent rotation, often at lower speeds, and definitely without the hammer function.
Table: Key Differences Between Concrete and Tile Drill Bits
| Feature | Concrete Drill Bit | Tile Drill Bit |
|---|---|---|
| Primary Material | Tungsten Carbide Tip | Diamond Grit or Tungsten Carbide |
| Design Focus | Aggressive Penetration & Durability | Smooth Cutting & Precision |
| Ideal For | Concrete, Brick, Hard Stone | Ceramic Tile, Porcelain Tile, Glass |
| Drill Function | Hammer Drill Recommended | Standard Drill (No Hammer) |
| Risk on Tile | High Risk of Chipping/Cracking | Low Risk of Chipping/Cracking |
Will a Concrete Drill Bit Actually Work on Tile?
So, to directly answer the question: Yes, a concrete drill bit can technically make a hole in tile. However, it’s like trying to use a chisel to slice a tomato – it might cut, but it’s not going to be clean, and you’re likely to end up with a mess. The aggressive nature of a concrete drill bit, especially when paired with a hammer drill function, is its biggest downfall when it comes to tile.
The Risks of Using a Concrete Bit on Tile
When you try to drill into tile with a concrete bit, here’s what’s likely to happen:
- Chipping and Cracking: The carbide tip is designed to chip away at concrete. On a brittle tile surface, this aggressive action can easily cause chips around the entry point and potentially crack the entire tile, especially if it’s thinner or has existing stress.
- Shattering: If you use the hammer drill function, the percussive action will almost certainly shatter the tile. This is the most common and frustrating outcome.
- Uneven Hole: Even if you manage to avoid cracking, the hole might be jagged and rough, not the clean opening you need for mounting fixtures or running wires.
- Damage to Your Drill: While less common, if the bit binds or chatters excessively due to the material not being suited for its design, it can put unnecessary strain on your drill.
When It Might Seem to Work (But Still Isn’t Ideal)
In some very specific, rare circumstances, you might get a hole with a concrete bit if:
- You are drilling into a very thick, robust porcelain tile.
- You use an extremely light touch.
- You use a very low speed on your drill.
- You disable the hammer function entirely.
Even then, the risk of damaging the tile is significantly higher than using the correct bit. It’s simply not the intended use, and the results are unpredictable and often poor.
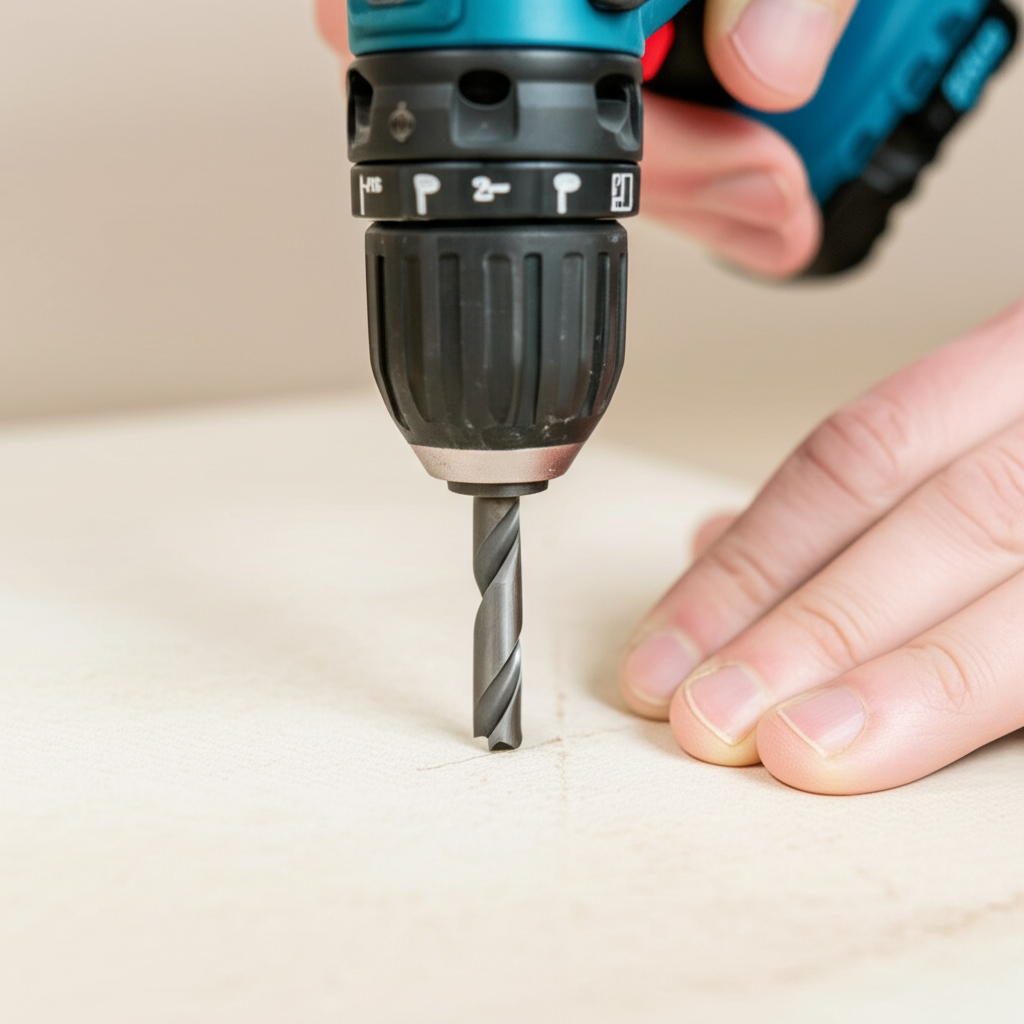
The Best Drill Bits for Tile and How to Use Them
To get that perfect hole without any damage, you need the right tool for the job. Fortunately, there are excellent options specifically designed for drilling tile.
1. Diamond-Tipped Drill Bits
These are often considered the gold standard for drilling tile and glass. They feature a tip coated with industrial diamond grit. The diamond grinds away the tile material rather than cutting or hammering it.
- Pros: Excellent for very hard materials like porcelain, granite, and glass. Provides a very clean cut. Can drill through multiple layers if needed.
- Cons: Can be more expensive. Require a steady, slow speed and constant cooling (usually with water).
- How to Use:
- Speed: Use a slow, steady speed. Too fast and you’ll overheat the bit and the tile.
- Pressure: Apply light, consistent pressure. Let the diamond grit do the work.
- Cooling: This is CRUCIAL. Drip water onto the drilling spot constantly. You can create a dam around the hole with plumber’s putty or masking tape to hold the water. This prevents the bit and tile from overheating, which can cause cracking.
- Drill Function: Absolutely NO hammer function.
2. Carbide-Tipped Masonry Bits (Specifically for Tile)
While we discussed concrete bits, there are also tungsten carbide-tipped bits specifically designed for masonry and tile. These are different from standard concrete bits in their tip geometry and intended use.
- Pros: More affordable than diamond bits. Effective for ceramic and softer porcelain tiles. Easier to find.
- Cons: May not be as effective or clean on extremely hard porcelain or natural stone as diamond bits. Can still cause chipping if used incorrectly.
- How to Use:
- Speed: Use a slow to medium speed.
- Pressure: Apply moderate, steady pressure.
- Cooling: While not as critical as with diamond bits, a little water can help extend the bit’s life and reduce dust.
- Drill Function: Absolutely NO hammer function.
3. Specialized Glass and Tile Bits
Many manufacturers offer bits labeled specifically for glass and tile. These often use a spear-shaped carbide tip. They are designed to score the surface and then cut cleanly.
- Pros: Widely available and generally inexpensive. Good for general-purpose tile drilling.
- Cons: Best suited for softer ceramic tiles. May struggle with very hard porcelain or natural stone.
- How to Use:
- Speed: Start slow to create a pilot mark, then increase to a medium speed.
- Pressure: Steady, moderate pressure.
- Cooling: Water can help, but it’s less critical than with diamond bits.
- Drill Function: Absolutely NO hammer function.
For a comprehensive overview of drilling techniques, the Popular Mechanics guide offers practical advice.
Step-by-Step Guide: Drilling Through Tile Safely
Ready to drill? Follow these steps for a clean, successful outcome:
Tools You’ll Need:
- Your chosen tile drill bit (diamond-tipped or carbide-tipped masonry/tile bit)
- A variable-speed drill (corded or cordless)
- Safety glasses
- Work gloves
- Masking tape or painter’s tape
- Water and a spray bottle or a small container for cooling (especially for diamond bits)
- Plumber’s putty (optional, for creating a water dam)
- A marker for marking your hole location
- A stud finder or electronic detector (if drilling near electrical or plumbing)
The Drilling Process:
- Preparation and Safety First:
- Put on your safety glasses. Tile dust can be harmful, and fragments can fly.
- Wear gloves to protect your hands.
- If drilling into a wall, use a stud finder to ensure you’re not drilling into electrical wires or plumbing pipes. Mark the location of any utilities.
- Mark Your Spot:
- Use a marker to clearly indicate where you want to drill the hole.
- Apply a piece of masking tape or painter’s tape over the marked spot. This helps prevent the drill bit from “walking” or slipping when you start, and it can also help reduce chipping.
- Set Up for Cooling (If Using Diamond Bits):
- For diamond bits, creating a small dam around your marked spot with plumber’s putty or tape can help hold water.
- Fill the dam with a small amount of water, or have your spray bottle ready to keep the area wet.
- Set Your Drill:
- Ensure your drill is set to a low to medium speed.
- Crucially, make sure the hammer drill function is turned OFF.
- Start Drilling:
- Hold the drill perpendicular to the tile surface.
- Begin drilling at a very slow speed to create a small indentation or pilot mark within your tape.
- Once you have a small starting point, gradually increase the speed to a steady, moderate pace.
- Apply light, consistent pressure. Let the bit do the work. Avoid forcing the drill.
- If using water, periodically add more to the drilling area to keep the bit and tile cool.
- Drilling Through the Tile:
- As you approach the other side of the tile, ease up on the pressure. This is when tiles are most likely to chip as the bit breaks through.
- Continue drilling slowly and steadily until the hole is complete.
- Finishing Up:
- Once the hole is drilled, carefully remove the drill bit.
- Remove the tape.
- Clean the area of any dust or debris.
- Inspect the hole for any chips or cracks. If you used water, clean up the excess.
For a visual demonstration, check out this helpful video from This Old House on drilling tile.
When to Consider Using a Concrete Bit (and When Not To)
It’s important to reiterate: for tile, a concrete drill bit is generally not the right choice. However, let’s consider scenarios where the lines might blur, and what you should always avoid.
Situations Where a Concrete Bit Might Be Considered (with extreme caution):
- Extremely Thick, Industrial Porcelain: Some ultra-dense porcelain tiles might be so hard that a standard tile bit struggles. In such cases, a masonry bit used without the hammer function, at very low speeds, with constant cooling, and a very gentle touch, might be a last resort. However, a diamond bit is still the superior and safer option.
- Drilling into Grout: If you only need to make a small hole in the grout between tiles, a concrete bit (again, no hammer) might be able to do it without damaging the tile. However, a smaller masonry bit or even a rotary tool with a grinding bit would be more precise.
Situations Where You Should NEVER Use a Concrete Bit on Tile:
- Standard Ceramic or Porcelain Tiles: The vast majority of tiles fall into this category, and they are too brittle for concrete bits.
- Glass Tiles: These are extremely delicate and will shatter with a concrete bit.
- When Using Hammer Drill Function: This is the fastest way to destroy your tile.
- When Speed is a Priority Over Quality: Rushing the job with the wrong tool will lead to rework and frustration.
Remember, the goal is a clean, functional hole. The lifespan of your tile and the quality of your finish depend on using the right bit.
Frequently Asked Questions (FAQ)
Q1: Can I use my hammer drill with a tile bit?
A: Absolutely not. Never use the hammer function on your drill when drilling into tile, regardless of the bit type. The percussive action will almost certainly crack or shatter the tile.
Q2: What’s the best drill bit for drilling holes in porcelain tile?
A: For porcelain tile, especially hard porcelain, diamond-tipped drill bits are the best choice. They grind through the dense material smoothly. Carbide-tipped masonry bits can also work on softer porcelain, but diamond bits offer superior performance and a cleaner finish.
Q3: How do I prevent tile from chipping when drilling?
A: Several techniques help:
- Use masking tape over the drilling spot to prevent the bit from “walking.”
- Start at a very slow speed to create a pilot mark.
- Apply steady, light pressure.
- Use the correct drill bit (diamond or carbide-tipped tile bit).
- Keep the bit and tile cool with water, especially with diamond bits.
- Ease up on pressure as you break through the other side.
Q4: Do I need to use water when drilling tile?
A: It’s highly recommended, especially when using diamond-tipped bits. Water acts as a coolant, preventing the bit and the tile from overheating. Overheating can lead to cracking and can also significantly shorten the life of your drill bit. For carbide bits, water is beneficial but less critical.