
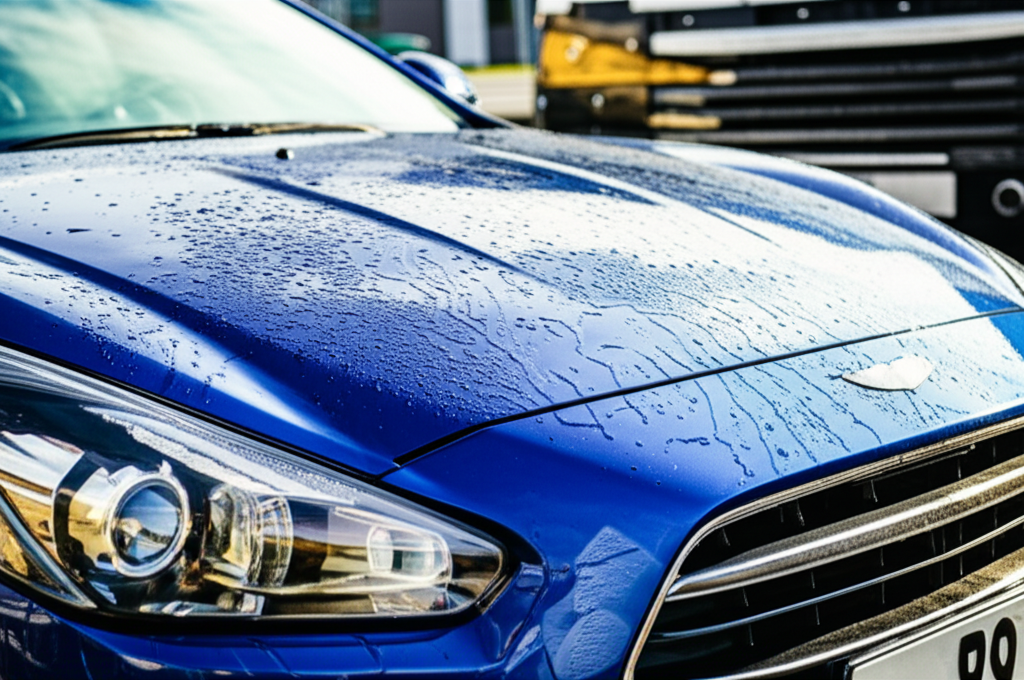
You should wait at least 24 hours, but ideally 30-90 days, before washing a newly painted car. This allows the paint to cure properly, preventing damage and ensuring a long-lasting finish. Patience is key for a pristine look!
Getting your car professionally painted is exciting! It’s like giving your ride a brand new lease on life. You’re probably eager to show it off and keep it looking its best. One of the first things you might think about is washing it. But hold on a second! Washing a newly painted car too soon can actually cause more harm than good. It’s a common concern for new car owners, and it can be frustrating not knowing the right approach. Don’t worry, we’re here to guide you through it with simple, proven tips. We’ll break down exactly how long to wait and what you should (and shouldn’t!) do to protect that beautiful new paint job.
Contents
- 1 Understanding Paint Curing: The Science Behind the Wait
- 2 How Long is “Long Enough”? Different Paint Types, Different Timelines
- 3 The Golden Rule: Patience is Your Best Friend
- 4 What You CAN Do (and Should Do) During the Curing Period
- 5 The First Wash: How to Do It Right
- 6 What to Avoid After the First Wash
- 7 Protecting Your Investment: Long-Term Care
- 8 Frequently Asked Questions (FAQ)
Understanding Paint Curing: The Science Behind the Wait
When your car is painted, it’s not just about slapping some color on. Modern automotive paints are complex chemical mixtures that need time to harden and form a durable protective layer. This process is called “curing.” Think of it like baking a cake – you can’t take it out of the oven too early, or it will be gooey and unstable. Car paint is similar; it needs time to reach its full hardness and resilience.
Automotive paints typically consist of several layers:
- Primer: This layer helps the paint adhere to the car’s surface and can fill in minor imperfections.
- Basecoat: This is the color layer you see.
- Clearcoat: This transparent layer protects the basecoat from UV rays, scratches, and environmental damage. It also provides the shine.
Each of these layers needs time to bond and harden. The solvents in the paint evaporate, allowing the resins to cross-link and create a solid film. This process is influenced by several factors, including the type of paint used, ambient temperature, and humidity.
How Long is “Long Enough”? Different Paint Types, Different Timelines
The exact timeframe for how long to wait to wash your car after paint depends heavily on the type of paint used and the specific products applied. While a general rule of thumb exists, it’s always best to consult with your auto body shop for their specific recommendations.
Here’s a breakdown of common paint types and their general curing times:
| Paint Type | Initial Set (Light Wash Possible) | Full Cure (Normal Washing & Waxing) | Notes |
|---|---|---|---|
| Single-Stage Enamel/Urethane | 24-48 hours | 7-14 days | Less common for modern vehicles, generally cures faster. |
| Basecoat/Clearcoat (Most Common) | 24-72 hours | 30-90 days | The clearcoat needs significant time to harden. This is the most critical type for waiting periods. |
| Waterborne Paints | 24-48 hours | 30-60 days | Becoming more popular due to environmental regulations. Curing times are similar to basecoat/clearcoat. |
| Ceramic Coatings (Applied over fresh paint) | 72 hours (initial cure) | 30-90 days (full cure) | Ceramic coatings add an extra layer of protection but also require their own curing time. |
The “initial set” time refers to when the paint is dry to the touch and firm enough for a very gentle rinse. The “full cure” time is when the paint has reached its maximum hardness and is safe for regular washing and waxing.
The Golden Rule: Patience is Your Best Friend
For most modern automotive paint jobs, especially those using a basecoat/clearcoat system, the safest bet is to wait at least 30 days before giving your car a thorough wash. Some experts recommend even longer, up to 90 days, to ensure the paint has reached its maximum hardness.
Why such a long wait? During the curing process, the paint is still susceptible to damage from:
- Pressure Washing: The high-pressure spray can easily strip or etch the still-soft paint.
- Harsh Soaps and Chemicals: Aggressive cleaning agents can break down the bonding agents in the paint before they are fully cured.
- Abrasive Materials: Rough sponges, brushes, or dirty wash mitts can create swirl marks and scratches.
- Bird Droppings, Tree Sap, and Bug Splatter: These contaminants can etch into the soft paint, leaving permanent marks.
- Waxing or Polishing: Applying wax or polish too early can trap solvents and prevent proper curing, leading to a dull finish or adhesion issues.
What You CAN Do (and Should Do) During the Curing Period
Just because you can’t wash it doesn’t mean you have to let your car get dirty. Here are some safe ways to maintain your car’s appearance during the waiting period:
1. Gentle Dust Removal
If your car is just dusty, you can carefully remove it using:
- A clean, high-quality microfiber duster: Use light, sweeping motions. Never apply pressure.
- Compressed air: This is a great option for blowing away dust without any physical contact.
The goal here is to avoid any friction or moisture that could affect the curing paint.
2. Waterless Wash (Use with Extreme Caution!)
For light dirt or grime, a waterless wash product can be an option, but it requires meticulous technique:
- Choose a high-quality waterless wash spray. These sprays contain lubricants that encapsulate dirt particles.
- Work in small sections. Spray the product liberally onto the surface.
- Use multiple clean microfiber towels. Gently wipe in one direction to lift the dirt.
- Flip the towel frequently to expose a clean surface.
- Never rub back and forth. Always use a straight-line motion.
- Avoid using this method if the car is heavily soiled with mud or grit, as this will likely cause scratches.
This method is best reserved for very light dust or fingerprints. If in doubt, stick to dusting or waiting.
3. Protecting Against Contaminants
While you wait, be mindful of potential contaminants:
- Park indoors if possible, away from direct sunlight, trees, and bird activity.
- If you must park outdoors, consider using a breathable car cover. Ensure the cover is clean before placing it on the car to avoid scratching.
- Address any bird droppings or tree sap immediately by gently blotting with a damp microfiber cloth (distilled water is best). Blot, don’t rub! Then, gently dry the area with another clean microfiber.
4. Avoiding the Gas Station
Be careful when fueling up. Try to avoid spilling gasoline on the new paint, as it can damage the clearcoat. If you do spill any, wipe it off immediately with a clean, damp microfiber cloth and then dry the area.
The First Wash: How to Do It Right
Once the recommended curing period has passed (remember, 30-90 days is the sweet spot), you can finally give your car its first proper wash. Here’s how to do it safely and effectively:
Tools You’ll Need:
- Two buckets (one for soapy water, one for rinsing your wash mitt)
- pH-neutral car wash soap
- High-quality wash mitts (microfiber or lamb’s wool are best)
- Multiple clean microfiber drying towels
- A gentle wheel cleaner (if needed)
- A separate wash mitt or brush for wheels
Step-by-Step Washing Guide:
- Rinse the Car: Start by thoroughly rinsing the entire car with a gentle stream of water. This removes loose dirt and debris, minimizing the risk of scratching during the washing process. A hose without a high-pressure nozzle is ideal.
- Prepare Your Buckets: Fill one bucket with clean water for rinsing your wash mitt. Fill the second bucket with water and add the recommended amount of pH-neutral car wash soap.
- Wash from Top to Bottom: Dip your wash mitt into the soapy water. Start washing the roof of the car and work your way down, section by section. This ensures that dirtier lower parts of the car don’t contaminate the cleaner upper parts.
- Rinse Your Wash Mitt Frequently: After washing each section, rinse your wash mitt thoroughly in the plain water bucket. This removes dirt and grit from the mitt before you dip it back into the soapy water. This is the crucial “two-bucket method” and greatly reduces the chance of scratching.
- Wash Wheels Separately: Use a separate bucket, wash mitt, and cleaner for your wheels. Wheels tend to accumulate the most abrasive brake dust and road grime. Washing them last and separately prevents transferring this grit to your paintwork.
- Rinse the Car Again: Once you’ve washed the entire car, rinse it thoroughly with clean water, starting from the top down. Ensure all soap residue is removed.
- Dry the Car Carefully: Use clean, plush microfiber drying towels. Gently pat or blot the water off the surface. Avoid rubbing vigorously. Work from top to bottom. You may need several towels to dry the entire car without re-soiling a towel.
Why the two-bucket method? It’s a simple yet incredibly effective way to prevent scratches. By rinsing your dirty wash mitt in a separate bucket before reloading it with soap, you remove abrasive particles that could otherwise be dragged across your freshly painted surface.
What to Avoid After the First Wash
Even after the initial curing period and your first wash, it’s wise to continue being gentle with your new paint for a while longer. Avoid these things for at least another month or two:
- Automatic Car Washes: The harsh brushes and harsh chemicals used in many automatic car washes can easily scratch and damage new paint.
- Clay Bar Treatments: While excellent for paint decontamination, clay bars are abrasive and should only be used after the paint has fully cured.
- Aggressive Polishing or Compounding: These processes remove paint layers and should be avoided until the paint is completely hardened.
- Waxing or Sealants (initially): While you can apply a high-quality, paint-safe wax or sealant after the initial cure, wait until the paint is fully hardened (90 days) for maximum protection and bonding. Consult your auto body shop for recommendations on products suitable for new paint.
Protecting Your Investment: Long-Term Care
Once your paint is fully cured, you can relax a bit more, but proper care is still essential to keep it looking great for years to come.
- Regular Washing: Washing your car every 2-4 weeks using the two-bucket method and pH-neutral soap is ideal.
- Protect the Finish: Consider applying a high-quality wax, sealant, or ceramic coating. These products add an extra layer of protection against UV rays, environmental contaminants, and minor scratches. Ceramic coatings, in particular, offer long-lasting durability and protection.
- Address Contaminants Promptly: Don’t let bird droppings, tree sap, or bug splatter sit on your paint for long. Clean them off as soon as possible.
- Be Mindful of Parking: Continue to park in shaded areas when possible and avoid parking under trees known for sap or bird activity.
For more information on proper car care and paint protection, resources like those from the Specialty Equipment Market Association (SEMA) offer excellent guidance for enthusiasts and car owners.
Frequently Asked Questions (FAQ)
Q1: Can I drive my car immediately after it’s painted?
Yes, you can typically drive your car immediately after it’s painted. However, it’s crucial to drive gently and avoid situations that could put stress on the paint. This includes avoiding high-speed driving, quick stops, and parking too close to other vehicles. Also, be very careful about parking under trees or in areas where bird droppings or tree sap are common, as these can damage the still-curing paint.
Q2: What happens if I wash my car too soon after painting?
Washing your car too soon can lead to several problems. The paint is still soft and vulnerable, so high-pressure water, harsh soaps, or abrasive wash mitts can cause scratches, swirl marks, or even lift the paint. You might also notice a dull finish or unevenness in the paint’s appearance if the solvents trapped in the paint can’t escape properly due to premature washing or sealing.
Q3: Is it okay to wax my car after it’s been painted?
No, you should not wax your car immediately after it has been painted. Waxing or applying any type of sealant too early can trap the solvents that need to evaporate for the paint to cure properly. This can hinder the curing process, leading to a weaker paint finish. Wait until the paint has fully cured, typically 30-90 days, before applying wax or sealants.
Q4: What is the difference between “dry” and “cured” paint?
Paint is considered “dry” when it’s no longer tacky to the touch and the surface feels hard. This usually happens within 24-72 hours. However, “cured” means the paint has reached its maximum hardness and durability. This is a much longer process, involving the complete evaporation of solvents and the chemical bonding of the paint layers. While dry to the touch, the paint is still relatively soft and vulnerable during the curing phase.
Q5: Can I use a pressure washer on a newly painted car?
It is strongly advised not to use a pressure washer on a newly painted car, especially within the first 30-90 days. The high pressure can easily damage the paint by etching into it, lifting edges, or causing delamination. Always opt for a gentle hose rinse during the initial curing period.
Q6: What about water spots? Are they bad for new paint?
Yes, water spots can be problematic for newly painted cars. If water containing minerals (like from sprinklers or untreated hose water) evaporates on the surface, it can leave behind mineral deposits. On fully cured paint, these are usually easy to remove. However, on paint that is still curing, these deposits can etch into the soft surface, causing permanent marks. It’s best to dry your car immediately after rinsing with a clean microfiber towel.
Q7: My auto body shop told me I can wash it after 24 hours. What gives?
Some auto body shops may advise a light rinse or wash after 24-72 hours, especially if they used specific types of paint or curing processes. This is often just for removing dust or road salt in critical situations. However, this is not the same as a thorough wash with soap and mitts. Always clarify with your specific auto body shop what they mean by “wash” and confirm their recommended full curing time for normal washing and waxing. The longer wait time (30-90 days) is the safest approach for ensuring maximum paint hardness and durability.