
Thinking about a do-it-yourself electric vehicle build? While a full conversion is a complex project, understanding the essential components and process is key. This guide breaks down the proven, fundamental steps for a successful DIY EV conversion, making the seemingly daunting achievable for the enthusiastic beginner.
Have you ever looked at an older car and thought, “I wish this ran on electricity”? Many of us have! The idea of transforming a classic or even a standard gasoline car into a quiet, clean, electric vehicle is incredibly appealing. It sparks thoughts of lower running costs, a smaller carbon footprint, and the satisfaction of building something unique. However, the sheer number of components and technical jargon can make it feel like an impossible dream for many. It’s easy to get lost in the complexity, wondering where to even begin. But what if I told you that with the right approach and a focus on the essentials, a DIY electric vehicle build is more within reach than you might think? We’re going to walk through the proven, fundamental aspects of this exciting journey, making it clear and manageable for you.
Contents
The Allure of the Do-It-Yourself Electric Vehicle
The appeal of a do-it-yourself electric vehicle (DIY EV) is multifaceted. For many, it’s about breathing new life into a beloved vehicle, preserving its character while upgrading its powertrain to be environmentally friendly and cost-effective. Imagine cruising in a vintage car that costs pennies to “fuel” and produces zero tailpipe emissions! Beyond the nostalgia and eco-consciousness, there’s a deep sense of accomplishment and a powerful learning experience that comes with building your own EV. You gain an intimate understanding of how electric vehicles work, which can be incredibly empowering.
Furthermore, the cost savings can be significant. While the initial investment in components can be substantial, the long-term savings on fuel and maintenance are undeniable. Electricity is generally cheaper than gasoline, and EVs have far fewer moving parts (no oil changes, spark plugs, or exhaust systems!), leading to lower upkeep costs. Government incentives and tax credits can also help offset the initial expenses, making the prospect even more attractive.
Is a DIY EV Conversion Right for You?
Before diving headfirst into sourcing parts and tools, it’s crucial to assess if a DIY EV conversion aligns with your skills, resources, and goals. This isn’t a weekend project for the faint of heart; it requires a significant commitment of time, patience, and a willingness to learn.
Key Considerations:
- Technical Aptitude: Do you enjoy working with your hands? Are you comfortable with basic electrical wiring, mechanical assembly, and problem-solving?
- Time Commitment: A full conversion can take hundreds, if not thousands, of hours. Are you prepared to dedicate consistent time to the build?
- Budget: While potentially saving money long-term, the upfront cost of components like batteries, motors, and controllers can range from $5,000 to $20,000 or more, depending on the desired range and performance.
- Workspace: You’ll need a safe, well-lit, and ventilated space to work on your vehicle, ideally with access to power.
- Tools: A comprehensive set of automotive tools, including specialized electrical tools like multimeters and crimpers, will be necessary.
- Donor Vehicle: Choosing the right vehicle to convert is important. Lighter vehicles are generally more efficient.
If you’re nodding along and feeling excited rather than overwhelmed, then a DIY EV conversion might be your next great adventure!
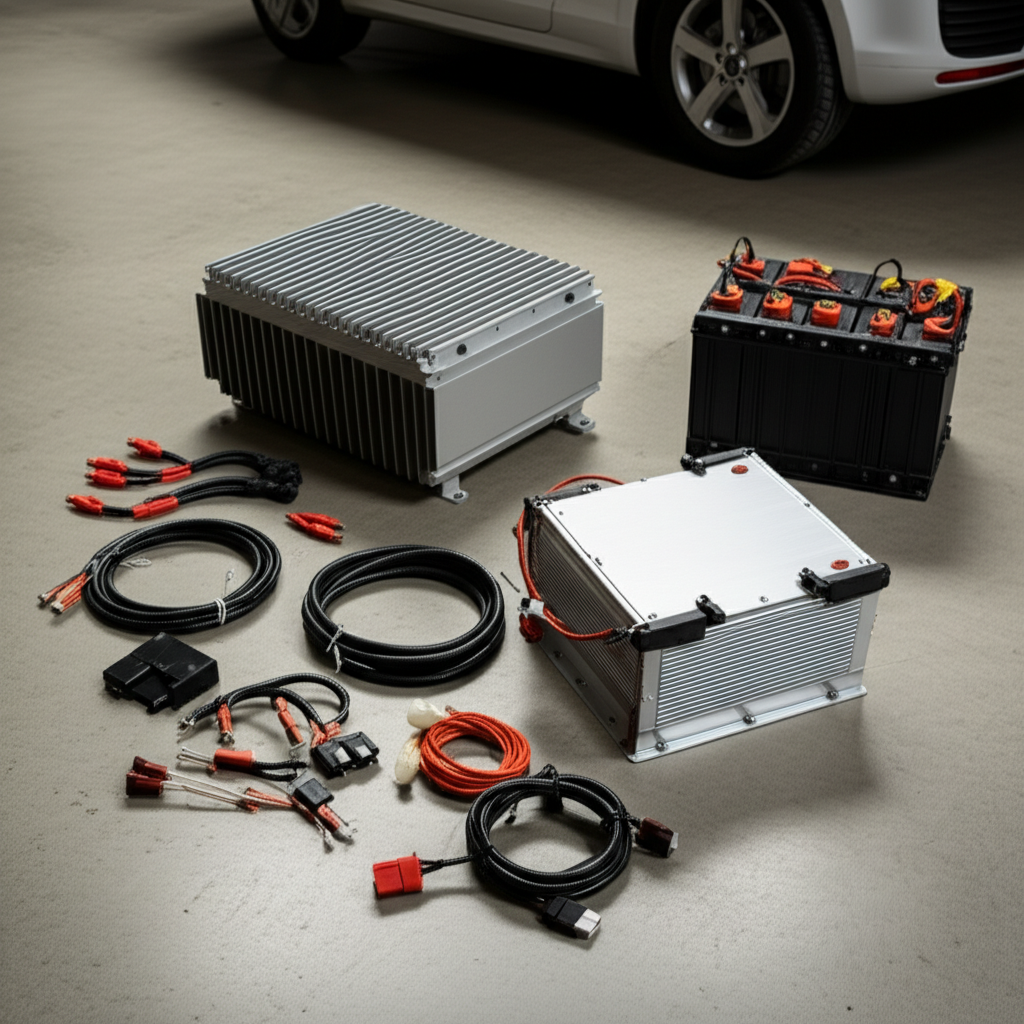
The Essential Components of a Do-It-Yourself Electric Vehicle
At its core, an electric vehicle conversion involves replacing the internal combustion engine (ICE) and its associated systems with an electric powertrain. Here are the proven, essential components you’ll need:
1. Electric Motor
This is the heart of your EV, providing the power to move the wheels. There are several types, but AC induction motors and permanent magnet synchronous motors (PMSM) are the most common choices for conversions.
- AC Induction Motors: Robust, reliable, and generally less expensive. They require a sophisticated controller but offer good performance.
- Permanent Magnet Motors (PMSM): More efficient, lighter, and offer higher power density (more power for their size). They are often preferred for their performance characteristics but can be more costly.
The size and power of the motor will depend on the weight of your donor vehicle and your desired performance (acceleration, top speed). Reputable suppliers often provide guidance on selecting the appropriate motor.
2. Motor Controller (Inverter)
The controller acts as the “brain” of the electric powertrain. It takes input from the accelerator pedal and manages the flow of electricity from the batteries to the motor, controlling its speed and torque. It also handles regenerative braking, where the motor acts as a generator to recapture energy when you slow down.
Choosing the right controller is critical and must be matched to your motor type and voltage requirements. High-quality controllers often offer advanced features like customizable performance profiles and diagnostics.
3. Batteries
Batteries are the “fuel tank” of your EV, storing the energy needed to power the motor. Lithium-ion battery packs are the standard for modern EVs due to their high energy density, longevity, and efficiency. Common chemistries include Lithium Iron Phosphate (LiFePO4), Lithium Nickel Manganese Cobalt Oxide (NMC), and Lithium Nickel Cobalt Aluminum Oxide (NCA).
- LiFePO4: Known for safety, long cycle life, and thermal stability, though slightly less energy-dense than NMC or NCA.
- NMC/NCA: Offer higher energy density, meaning more range for a given weight, but can be more expensive and require more careful thermal management.
The total capacity of your battery pack (measured in kilowatt-hours, kWh) will determine your EV’s range. You’ll need to consider how many battery modules you can fit into your vehicle and ensure they are properly configured and protected.
4. Battery Management System (BMS)
A BMS is an absolutely critical safety component for any lithium-ion battery pack. It monitors the voltage, temperature, and state of charge of individual battery cells or modules. The BMS prevents overcharging, over-discharging, and overheating, which can damage the batteries and pose a fire risk. It also helps to balance the charge across cells, ensuring optimal performance and longevity of the pack.
A good BMS communicates with the motor controller and charger, providing essential data for safe and efficient operation.
5. On-Board Charger
This component converts AC power from the grid (or a charging station) into DC power to charge your battery pack. The charger’s power rating (e.g., 3.3 kW, 6.6 kW, 11 kW) determines how quickly your EV can be recharged. You’ll need to match the charger’s voltage and current capabilities to your battery pack.
6. DC-DC Converter
Your high-voltage battery pack powers the electric motor. However, your car’s original 12-volt system (for lights, wipers, radio, etc.) still needs power. A DC-DC converter steps down the high voltage from the main battery pack to the 12 volts required by these accessories. This effectively replaces the alternator in a gasoline car.
7. Throttle Control and Instrumentation
You’ll need an electronic throttle pedal to signal the motor controller your desired acceleration. Additionally, you’ll want instrumentation to monitor key parameters like battery state of charge (SoC), motor temperature, and speed. Many modern controllers integrate with digital displays or can be linked to smartphone apps.
8. Charging Port
This is the external connection point for charging your EV. Common standards include J1772 (Type 1) in North America and Type 2 in Europe for AC charging, and CCS or CHAdeMO for DC fast charging. For a DIY build, a J1772 port is a common and accessible choice.
9. Cooling System
Both the motor and the motor controller can generate significant heat, especially under heavy load. A cooling system, often using a radiator, coolant pump, and fans, is essential to maintain optimal operating temperatures and prevent overheating. Battery packs may also require thermal management, either active (cooling/heating) or passive.
10. Adapter Plate and Coupler
To connect your electric motor to the existing transmission or driveshaft of your donor vehicle, you’ll typically need a custom-made adapter plate and a flexible coupler. This ensures a secure and vibration-free connection between the motor and the drivetrain.
The Proven Build Process: Step-by-Step
Embarking on a DIY EV conversion is a journey. Here’s a breakdown of the essential steps involved in a proven build process:
Step 1: Planning and Design
This is arguably the most crucial stage. Thorough planning prevents costly mistakes and ensures a safe, functional vehicle.
- Choose Your Donor Vehicle: Select a vehicle that is relatively lightweight, in good mechanical condition, and has ample space for batteries and components. Classic cars, small hatchbacks, or older trucks are popular choices.
- Define Your Goals: What kind of range do you need? What performance characteristics are you looking for? This will dictate the size of your motor and battery pack.
- Component Selection: Research and select compatible motor, controller, batteries, BMS, charger, and DC-DC converter. Many experienced EV converters recommend specific combinations or brands. Websites like EV West and Thunderstruck Motors are excellent resources for components and advice.
- Layout and Packaging: Plan where each component will be physically located within the vehicle. Consider weight distribution for balanced handling and safety. Batteries are often placed in the engine bay, trunk, or under the floor.
- Wiring Diagram: Create a detailed wiring diagram for the entire high-voltage and low-voltage system. This is vital for safe and correct installation.
Step 2: Preparation and Removal of ICE Components
With your plan in place, it’s time to get your hands dirty.
- Drain Fluids: Safely drain all engine oil, coolant, and transmission fluid.
- Remove Engine and Drivetrain: Carefully disconnect and remove the internal combustion engine, transmission (if you’re keeping it), exhaust system, fuel tank, radiator, and associated plumbing.
- Clean the Engine Bay: Thoroughly clean the engine bay and surrounding areas.
Step 3: Mounting the Electric Motor and Adapter Plate
This step requires precision to ensure proper alignment.
- Fabricate or Acquire Adapter Plate: This plate bolts to the electric motor on one side and the transmission or driveshaft flange on the other.
- Mount the Motor: Securely mount the electric motor to the adapter plate and then to the vehicle’s chassis or subframe. Ensure correct alignment with the drivetrain.
- Connect to Drivetrain: Attach the motor’s output shaft to the transmission input shaft or directly to the driveshaft using a coupler.
Step 4: Battery Pack Installation
Safety is paramount when handling battery modules.
- Construct or Mount Battery Boxes: Create or install secure, protected enclosures for your battery modules. These should be robust and weatherproof.
- Install Battery Modules: Carefully place the battery modules into their enclosures.
- Wire Battery Modules: Connect the battery modules in series and parallel according to your voltage and capacity requirements. This is where the BMS is integrated, with individual cell taps connected to the BMS for monitoring.
- High-Voltage Cabling: Use appropriately rated, high-quality high-voltage cables and connectors for all connections between batteries, controller, and charger. Follow strict safety protocols, including using insulated tools and disconnecting power sources.
Step 5: Installing Other Powertrain Components
Connect the remaining essential parts of the electric powertrain.
- Mount Motor Controller: Securely mount the motor controller, typically in the engine bay or a protected location, ensuring adequate ventilation.
- Install On-Board Charger and DC-DC Converter: Mount these components and connect them to the battery pack and the vehicle’s 12-volt system, respectively.
- Wire Components: Connect the motor, controller, charger, BMS, and throttle pedal according to your wiring diagram. Double-check all connections.
- Install Cooling System: Set up radiators, pumps, and fans for the motor and controller, and connect them to the battery pack for optimal temperature management.
Step 6: Integrating the 12-Volt System
Ensure your car’s accessories work correctly.
- Connect DC-DC Converter: Wire the output of the DC-DC converter to the vehicle’s original 12-volt battery and electrical system.
- Test 12-Volt Accessories: Verify that headlights, wipers, turn signals, and interior electronics function as expected.
Step 7: Instrumentation and Controls
Make your EV user-friendly.
- Install Throttle Pedal: Mount the electronic throttle pedal and connect it to the motor controller.
- Install Gauges/Display: Mount your chosen dashboard display or gauges to monitor critical EV parameters. Connect them to the controller and BMS.
- Safety Interlocks: Implement safety interlocks, such as a neutral safety switch or a system to prevent accidental engagement of the motor.
Step 8: Final Checks, Testing, and Commissioning
The moment of truth!
- System Checks: Conduct thorough visual and electrical checks of all connections and components. Use a multimeter to verify voltages and continuity.
- Low-Power Testing: With the vehicle safely supported (e.g., on jack stands), perform initial low-power tests of the motor and controller.
- First Drive: Gradually test the vehicle at low speeds in a safe, controlled environment. Monitor all parameters closely.
- Troubleshooting: Be prepared to troubleshoot any issues that arise. This is a normal part of the process.
Essential Tools and Resources for Your Build
Having the right tools makes a significant difference in the ease and safety of your DIY EV conversion. Here’s a list of essential tools and helpful resources:
Essential Tools:
- Mechanics Tool Set: Sockets, wrenches, screwdrivers, pliers, etc.
- Torque Wrench: Crucial for ensuring components are tightened to specification.
- Multimeter: For measuring voltage, current, and resistance.
- Wire Strippers and Crimpers: High-quality tools for making reliable electrical connections.
- Hydraulic or Floor Jack and Jack Stands: For safely lifting and supporting the vehicle.
- Angle Grinder and Metal Saw: For any necessary fabrication or cutting.
- Welder (Optional but Recommended): For fabricating custom mounts or battery boxes.
- Drill and Drill Bits: For creating mounting holes.
- Safety Gear: Safety glasses, gloves, fire extinguisher (Class ABC and D for batteries), and insulated tools.
Helpful Resources:
Beyond components, knowledge is key. Here are some excellent places to learn and get support:
- DIY Electric Car Forums: Websites like diyelectriccar.com are invaluable communities where you can ask questions, share progress, and learn from experienced builders.
- Books and Manuals: Numerous books detail EV conversion techniques. Look for titles that cover electrical systems, battery management, and motor integration.
- Manufacturer Documentation: Always refer to the technical manuals and datasheets for your specific motor, controller, and BMS.
- Government Agencies: For information on vehicle modification regulations and safety standards, consult your local Department of Motor Vehicles (DMV) or equivalent transportation authority. For example, the National Highway Traffic Safety Administration (NHTSA) provides safety standards.
- Professional EV Conversion Shops: Even if you’re doing it yourself, sometimes consulting with or getting advice from professionals can save you a lot of headaches.
Common Challenges and How to Overcome Them
While rewarding, a DIY EV conversion isn’t without its hurdles. Being aware of common challenges can help you prepare and find solutions.
Challenge: Weight and Weight Distribution
Problem: Batteries are heavy, and their placement can significantly affect a vehicle’s handling and suspension.
Solution: Plan battery placement carefully, aiming for a low center of gravity. Distribute weight as evenly as possible between the front and rear axles. You may need to upgrade suspension components to handle the added weight.
Challenge: Heat Management
Problem: Motors and controllers generate heat, especially during demanding use. Overheating can lead to reduced performance and component damage.
Solution: Implement a robust cooling system with adequate radiators, fans, and coolant