
Can you do car maintenance yourself? Absolutely! Many essential car maintenance tasks are surprisingly straightforward and can be handled by beginners. From checking tire pressure and topping up fluids to replacing wiper blades and air filters, DIY car care saves money, builds confidence, and keeps your vehicle running smoothly. Let’s explore the genius tips to get you started!
Hey there, fellow drivers and car enthusiasts! It’s Jake from AMZTechHub, and I’m thrilled you’re here. Ever stare at your car’s dashboard, see a little light blink on, and feel that familiar pang of “Oh no, what’s that going to cost?” We’ve all been there. Taking your car to the shop for every little thing can feel like a drain on your wallet and your time. But what if I told you that a surprising amount of basic car maintenance is actually within your reach?
You don’t need to be a master mechanic or have a garage full of specialized tools to keep your car in great shape. Think of it as getting to know your machine a little better. It’s empowering, it’s economical, and honestly, it can even be a little bit satisfying. We’re going to break down some of the most common and impactful car maintenance tasks that you can tackle yourself, safely and effectively. Get ready to save some cash and gain some confidence!
Contents
Why Learn Basic Car Maintenance? The Perks of DIY
Taking the reins on some of your car’s upkeep isn’t just about saving a few bucks, although that’s a pretty sweet perk! It’s about understanding your vehicle better, building confidence, and ensuring its longevity. When you know how to perform these simple checks and replacements, you can often catch small issues before they become big, expensive problems. Plus, there’s a real sense of accomplishment that comes with knowing you can handle a task that might have seemed intimidating at first.
Here’s a quick look at the benefits:
Save Money: This is usually the biggest driver (pun intended!). Labor costs can add up quickly.
Preventative Care: Catching small issues early can prevent major repairs down the line.
Increased Confidence: Understanding your car makes you a more informed and empowered driver.
Vehicle Longevity: Regular, proper maintenance helps your car last longer.
Environmental Friendliness: Properly inflated tires and efficient filters can improve fuel economy, reducing your carbon footprint.
Let’s dive into the specifics of what you can realistically do yourself.
Essential Car Maintenance You Can Do at Home
The world of DIY car care is vast, but we’re going to focus on the absolute essentials that most drivers can master with minimal fuss. These are the tasks that make a real difference in your car’s performance and reliability.
1. Checking and Adjusting Tire Pressure
This is arguably the most important and easiest DIY maintenance task. Properly inflated tires are crucial for safety, fuel efficiency, and tire longevity.
Why it matters: Under-inflated tires can lead to poor handling, increased braking distance, and premature wear. Over-inflated tires can result in a rougher ride and reduced traction.
How to do it:
1. Find the correct pressure: Look for a sticker on the driver’s side doorjamb, in your owner’s manual, or sometimes inside the fuel filler door. This is the recommended pressure, not the maximum pressure listed on the tire sidewall.
2. Get a tire pressure gauge: These are inexpensive and available at auto parts stores or even some gas stations. Digital gauges are often easier to read.
3. Check when tires are cold: The best time to check is before you’ve driven the car, or after it’s been sitting for at least three hours. Driving heats up the tires, which increases the air pressure.
4. Unscrew the valve cap: On each tire, carefully unscrew the small black cap from the tire valve stem.
5. Attach the gauge: Press the tire pressure gauge firmly onto the valve stem. You might hear a slight hiss of air; this is normal.
6. Read the pressure: The gauge will display the current tire pressure.
7. Add or release air: If the pressure is low, use an air compressor (often available at gas stations, usually for a small fee) to add air. If it’s too high, press the small pin in the center of the valve stem with the back of the gauge or a small tool to release air.
8. Re-check and replace cap: After adding or releasing air, re-check the pressure. Once it’s correct, screw the valve cap back on tightly.
9. Repeat for all tires: Don’t forget your spare tire if your car has one!
Tools needed: Tire pressure gauge, access to an air compressor (if needed).
2. Topping Up Essential Fluids
Your car relies on various fluids to operate smoothly and safely. Knowing where they are and how to check them is a game-changer.
Engine Oil:
Why it matters: Oil lubricates moving parts, reduces friction, and helps cool the engine.
How to check:
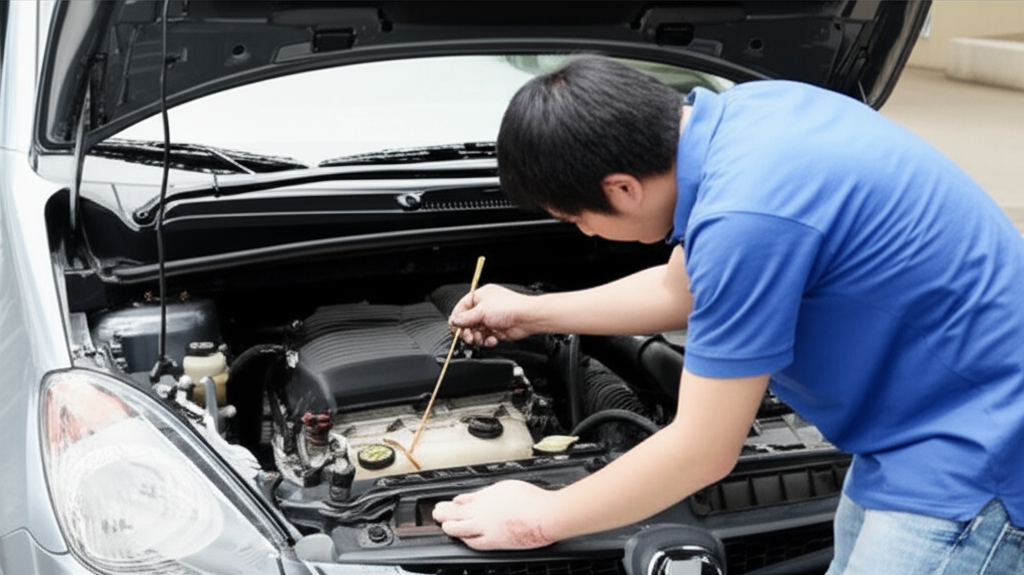
1. Park your car on a level surface and turn off the engine. Wait a few minutes for the oil to settle.
2. Locate the oil dipstick (usually has a brightly colored handle, often yellow or orange).
3. Pull out the dipstick, wipe it clean with a rag or paper towel, and reinsert it fully.
4. Pull it out again and check the oil level. There will be markings (like “add” and “full” or dots/lines). The oil level should be between these marks.
5. If low, add the correct type of oil (check your owner’s manual!) a little at a time, re-checking the level until it’s correct. Don’t overfill!
Tools needed: Rag or paper towel, the correct type of engine oil.
Coolant (Antifreeze):
Why it matters: Coolant prevents your engine from overheating in hot weather and freezing in cold weather.
How to check:
1. NEVER open the radiator cap when the engine is hot! The system is pressurized, and hot coolant can spray out and cause severe burns.
2. Locate the coolant reservoir (usually a translucent plastic tank with “Min” and “Max” lines).
3. Check the level when the engine is cold. It should be between the Min and Max lines.
4. If low, add a 50/50 mixture of coolant and distilled water (or the pre-mixed coolant specified in your manual).
Tools needed: Coolant, distilled water (if mixing), funnel.
Windshield Wiper Fluid:
Why it matters: Keeps your windshield clear for visibility.
How to check:
1. Locate the windshield washer fluid reservoir. The cap usually has a windshield wiper symbol on it.
2. Open the cap and check the fluid level.
3. Top up with windshield washer fluid (do not use plain water, as it can freeze in winter and doesn’t clean as effectively).
Tools needed: Windshield washer fluid, funnel (optional).
Brake Fluid:
Why it matters: Essential for your braking system.
How to check:
1. Locate the brake fluid reservoir (usually a small, translucent tank near the driver’s side firewall).
2. Check the fluid level against the markings on the reservoir.
3. If the level is consistently low, it might indicate a leak in your brake system, and you should have it inspected by a professional. You can top it up, but it’s a temporary fix if there’s a leak. Always use the specific type of brake fluid recommended in your owner’s manual (e.g., DOT 3, DOT 4).
Tools needed: Correct type of brake fluid, funnel (optional).
Important Note: Always consult your owner’s manual for the specific types of fluids and their locations for your vehicle.
3. Replacing Wiper Blades
Worn-out wiper blades are a safety hazard, especially in rain or snow. Replacing them is a simple task that dramatically improves visibility.
Why it matters: Streaky or chattering wipers reduce visibility, making driving dangerous.
How to do it:
1. Purchase the correct size: Check your owner’s manual or measure your old blades. Most auto parts stores can also help you find the right size.
2. Lift the wiper arm: Gently lift the wiper arm away from the windshield until it locks in place.
3. Release the old blade: Most wiper blades have a small tab or clip that you need to press or slide to release the blade from the wiper arm. Consult your new wiper blade packaging if unsure; they vary by design.
4. Attach the new blade: Slide the new blade onto the wiper arm until it clicks into place. Ensure it’s securely attached.
5. Lower the wiper arm: Carefully lower the wiper arm back onto the windshield.
6. Repeat for the other side.
Tools needed: New wiper blades.
4. Replacing the Engine Air Filter
A clean engine air filter allows your engine to breathe properly, improving performance and fuel efficiency.
Why it matters: A clogged filter restricts airflow, making your engine work harder and consume more fuel.
How to do it:
1. Locate the air filter housing: This is usually a black plastic box under the hood, connected to the engine’s intake.
2. Open the housing: It’s typically secured with clips or screws. Release the clips or unscrew the fasteners.
3. Remove the old filter: Carefully lift out the old air filter. Note its orientation.
4. Clean the housing: Wipe out any dirt or debris from inside the air filter housing with a damp cloth.
5. Install the new filter: Place the new filter in the housing, ensuring it sits correctly and is oriented the same way as the old one.
6. Close the housing: Secure the clips or screws to close the housing properly.
Tools needed: New engine air filter, possibly a screwdriver or socket wrench.
5. Replacing the Cabin Air Filter
This filter cleans the air that comes into your car’s interior, improving air quality for you and your passengers.
Why it matters: A dirty cabin air filter can reduce airflow from your vents and circulate dust, pollen, and pollutants inside your car.
How to do it:
1. Locate the cabin air filter: This is often behind the glove compartment. You might need to remove the glove compartment or a small panel to access it. Your owner’s manual is your best friend here, as locations vary wildly!
2. Remove the old filter: Once accessed, the filter is usually in a slot. Slide it out carefully.
3. Install the new filter: Insert the new filter, paying attention to any airflow direction arrows printed on the filter itself.
4. Reassemble: Put back any panels or the glove compartment you removed.
Tools needed: New cabin air filter, possibly a screwdriver or trim removal tool.
6. Checking and Replacing Headlight/Taillight Bulbs
Ensuring all your lights are working is crucial for safety and legality.
Why it matters: Faulty lights can impair your vision and make you less visible to other drivers, leading to accidents or tickets.
How to do it:
1. Identify the faulty bulb: Check all your lights (headlights, taillights, brake lights, turn signals) when the car is on.
2. Consult your owner’s manual: This is essential, as access to bulbs varies greatly. Some are easy to reach from behind the headlight/taillight assembly, while others might require removing the entire assembly or accessing them from under the hood or in the trunk.
3. Purchase the correct bulb: Make sure you get the exact replacement bulb type specified in your manual.
4. Access and replace: Follow the manual’s instructions to access the bulb holder. Gently twist or unclip the old bulb, replace it with the new one, and reassemble. Avoid touching the glass part of the new bulb with your bare fingers, as oils from your skin can cause it to overheat and burn out prematurely. Use a clean cloth or gloves.
Tools needed: New bulb, clean cloth or gloves, possibly a screwdriver or socket wrench.
7. Cleaning Your Car’s Battery Terminals
Corrosion on battery terminals can impede electrical flow, causing starting issues.
Why it matters: Corrosion can prevent your car from starting or cause electrical problems.
How to do it:
1. Safety first: Wear safety glasses and gloves. Batteries contain corrosive acid.
2. Disconnect the battery: Start by disconnecting the negative (-) terminal first (usually black), then the positive (+) terminal (usually red).
3. Check for corrosion: Look for a powdery, bluish-white substance on the terminals and cable clamps.
4. Clean the terminals: You can use a wire brush or a specialized battery terminal cleaning tool. A mixture of baking soda and water can also be used as a cleaning solution. Apply it to the terminals and scrub away the corrosion.
5. Rinse and dry: Rinse the terminals with clean water and dry them thoroughly.
6. Reconnect the battery: Reconnect the positive (+) terminal first, then the negative (-) terminal.
7. Apply anti-corrosion spray (optional): You can apply a thin layer of dielectric grease or anti-corrosion spray to the terminals to help prevent future buildup.
Tools needed: Safety glasses, gloves, wire brush or battery terminal cleaner, baking soda, water, clean rags.
A Quick Guide to Common DIY Car Maintenance Tasks
Here’s a handy table summarizing some key DIY tasks, their frequency, and why they’re important.
| Maintenance Task | Frequency Recommendation | Why It’s Important | Difficulty Level |
| :————————- | :—————————- | :—————————————————————————— | :————— |
| Check Tire Pressure | Monthly & before long trips | Safety, fuel economy, tire life | Very Easy |
| Check Engine Oil | Monthly & before long trips | Engine lubrication, cooling, performance | Easy |
| Check Coolant | Monthly | Engine temperature regulation | Easy |
| Check Windshield Wiper Fluid | As needed | Visibility | Very Easy |
| Replace Wiper Blades | Every 6-12 months | Visibility, safety in bad weather | Easy |
| Replace Engine Air Filter | Every 15,000-30,000 miles | Engine performance, fuel efficiency | Easy |
| Replace Cabin Air Filter | Every 15,000-30,000 miles | Interior air quality, HVAC performance | Easy/Moderate |
| Check/Replace Bulbs | As needed | Visibility, safety, legal compliance | Easy/Moderate |
| Clean Battery Terminals | Annually or as needed | Electrical system reliability, starting ability | Easy |
Note: Frequencies are general guidelines. Always refer to your vehicle’s owner’s manual for specific recommendations.
When to Call a Professional
While DIY maintenance is fantastic, it’s important to know your limits. Some tasks are more complex, require specialized tools, or involve critical safety systems. If you’re ever unsure or uncomfortable, it’s always best to consult a qualified mechanic.
Here are a few examples of when you should definitely seek professional help:
Brake System Service: While checking brake fluid is easy, replacing brake pads, rotors, or bleeding the brake lines requires specific knowledge and tools.
Oil Changes (if you’re not comfortable): While many find oil changes manageable, some prefer to leave this to professionals, especially if they don’t have a safe way to dispose of used oil.
Spark Plug Replacement: This can be straightforward on some engines, but on others, it requires specific torque wrenches and can be difficult to access.
Timing Belt Replacement: This is a critical maintenance item that, if done incorrectly, can cause severe engine damage.
Any task involving the transmission or engine internals.
* Diagnosing warning lights: If a warning light comes on and you don’t know what it means, it’s best to get it checked out.
The U.S. Department of Transportation’s National Highway Traffic Safety Administration (NHTSA) offers valuable resources on vehicle safety and maintenance. You can find information on recalls, safety tips, and understanding vehicle warning lights on their website: https://www.nhtsa.gov/
The Automotive Aftermarket Suppliers Association (AASA) also provides consumer resources related to vehicle maintenance and repair: https://www.aftermarket.org/
Frequently Asked Questions (FAQ)
Here are some common questions beginner DIYers have about car maintenance:
What are the absolute easiest car maintenance tasks a beginner can do?
The easiest tasks involve simple visual checks and top-offs. These include checking your tire pressure, topping up windshield washer fluid, and checking your engine oil and coolant levels using the dipstick and reservoir markings. Replacing wiper blades and engine air filters are also very beginner-friendly once you locate them.</p
Hi, I’m Jake Carter. I’m passionate about everything on wheels and the tools that keep them running. From keeping cars spotless to testing the latest power tools, I love sharing practical tips that help drivers, DIYers, and enthusiasts get more out of their machines. On AMZTechHub, I cover everything from car washing and maintenance to power tool guides and workshop advice—making it simple for anyone to keep their ride and their gear in top shape.