
Fix Flat Tire With Duct Tape: Proven Solution
Yes, you can temporarily fix a flat tire with duct tape in a pinch! This guide offers a proven, beginner-friendly method to get you back on the road safely until you can reach a proper repair shop. Learn the simple steps to patch your tire and drive with confidence.
Contents
- 1 Don’t Let a Flat Tire Ruin Your Day!
- 2 Is Duct Tape Really a Tire Fix? Understanding the “Why”
- 3 Gathering Your Supplies: What You’ll Need
- 4 Step-by-Step: How to Fix a Flat Tire with Duct Tape
- 5 When Duct Tape Isn’t Enough: Limitations and Safety
- 6 Alternative Temporary Fixes and When to Call for Help
- 7 Duct Tape vs. Tire Plugs: A Quick Comparison
- 8 Frequently Asked Questions (FAQ)
Don’t Let a Flat Tire Ruin Your Day!
Getting a flat tire can be a real headache, especially if you’re new to driving or not mechanically inclined. It’s a common problem that can happen to anyone, anywhere. The good news is, with a little know-how and some readily available duct tape, you can often manage a temporary fix. This guide is here to walk you through it, step-by-step, with simple explanations so you feel confident and prepared. We’ll show you how to use duct tape to get your car moving again until you can get to a professional for a permanent repair.
Is Duct Tape Really a Tire Fix? Understanding the “Why”
Before we dive into the “how,” let’s talk about the “why.” Can you really fix a flat tire with duct tape? The short answer is: yes, but only as a temporary, emergency solution. Duct tape, particularly heavy-duty, waterproof varieties, is incredibly strong and adhesive. It can create a surprisingly effective seal for small punctures or leaks, especially when applied correctly and under pressure. Think of it as a highly effective bandage for your tire, buying you precious time to reach safety.
It’s crucial to understand that this is not a permanent repair. A duct tape patch won’t withstand the constant flexing, heat, and pressure of normal driving for long. Its purpose is to get you from a vulnerable roadside position to a mechanic or tire shop without further risk. We’ll cover the limitations and when you absolutely must seek professional help later in this guide.
Gathering Your Supplies: What You’ll Need
To tackle a flat tire with duct tape, you’ll need a few key items. Having these on hand before you need them is always a good idea for any driver.
- Heavy-Duty Duct Tape: This is your star player! Look for brands known for their strength and adhesion. Silver or gray “gorilla tape” or reinforced duct tape is ideal. Avoid thin, cheap varieties.
- Tire Inflator/Pump: You’ll need to reinflate the tire after applying the tape. A portable 12V air compressor that plugs into your car’s cigarette lighter is perfect for this.
- Gloves: To keep your hands clean.
- Jack and Lug Wrench: These are essential for lifting the car and removing the wheel, which is often necessary for a more effective tape application. Your car should have these in the trunk.
- Wheel Chocks (Optional but Recommended): Blocks placed behind the wheels to prevent the car from rolling.
- Water or Soapy Water: To help create a smooth, airtight seal.
- Clean Rag or Paper Towels: For cleaning the tire surface.
Important Note: If you’re unsure about using a car jack or lug wrench, it’s best to consult your car’s owner’s manual or watch a quick tutorial video before you’re in a roadside emergency. Safety first!
Step-by-Step: How to Fix a Flat Tire with Duct Tape
Let’s get your tire patched up. Remember, this is a temporary fix, so drive slowly and directly to a repair shop.
Step 1: Find a Safe Location
This is the absolute first and most critical step. Pull over as far off the road as possible, onto a level surface. Avoid soft shoulders or busy traffic lanes. Turn on your hazard lights immediately to alert other drivers. Your safety is paramount.
Step 2: Loosen the Lug Nuts
Before you lift the car, use your lug wrench to loosen the lug nuts on the flat tire. Turn them counter-clockwise. You only need to loosen them about half a turn to a full turn – just enough to break them free. Why? Loosening them while the tire is still on the ground prevents the wheel from spinning as you try to turn the nuts.

Step 3: Jack Up the Vehicle
Locate the designated jacking point for your car (check your owner’s manual). Position the jack securely and begin raising the vehicle until the flat tire is completely off the ground. Make sure the jack is stable and the car is not leaning precariously.
Step 4: Remove the Flat Tire
Finish unscrewing the lug nuts you loosened earlier. Keep them together in a safe place (like a pocket or hubcap) so you don’t lose them. Carefully pull the flat tire straight off the wheel studs and set it aside.
Step 5: Locate and Prepare the Puncture
Inspect the tire surface to find the puncture or leak. Clean the area around the puncture thoroughly with your rag or paper towels. If you have soapy water, you can apply it to the tire surface; if you see bubbles, you’ve found the leak!
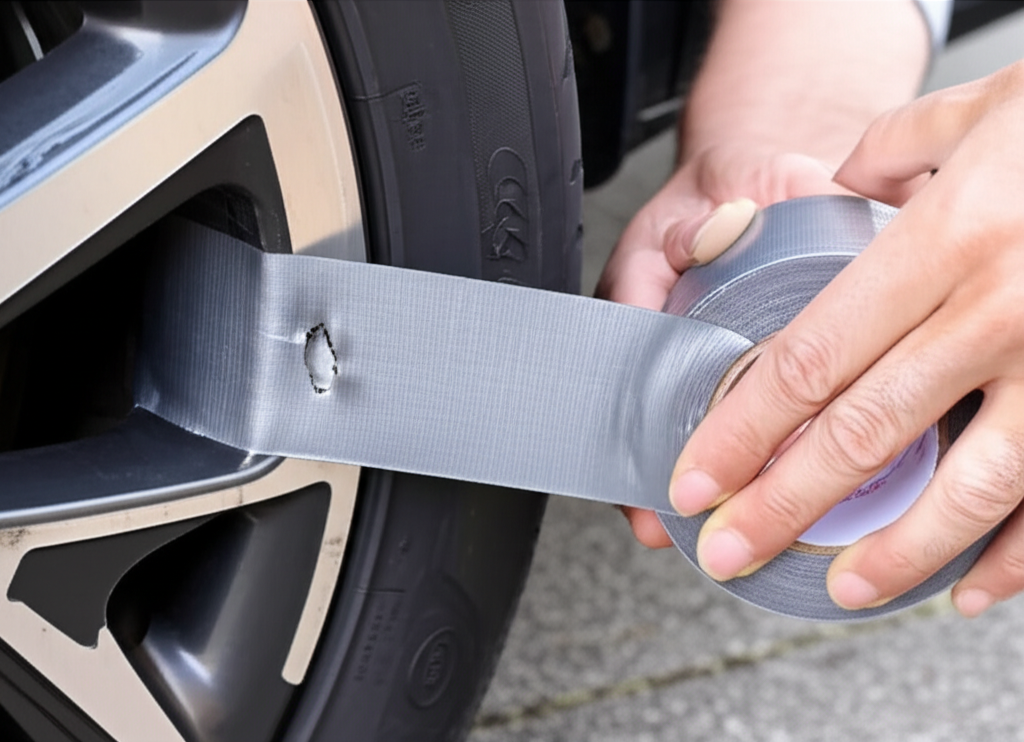
Step 6: Apply the Duct Tape
This is where the magic happens! Cut a generous piece of duct tape, long enough to wrap around the tire several times. Start by pressing one end of the tape firmly onto the tire, just above the puncture. Then, begin wrapping the tape tightly around the tire, overlapping each layer by at least half the width of the tape. Smooth out any air bubbles as you go. The goal is to create a strong, seamless seal over the damaged area. You might need several layers.
Pro Tip: For better adhesion and a smoother surface, you can slightly dampen the tire surface with water or soapy water before applying the tape. This helps the tape conform to the tire’s shape and reduces the chance of air pockets.
Step 7: Reinstall the Tire
Carefully place the tire back onto the wheel studs. Screw the lug nuts back on by hand as tightly as you can. Then, lower the car gently until the tire just touches the ground. Now, use the lug wrench to tighten the lug nuts firmly in a star pattern (tighten one, then the one opposite it, and so on). Why a star pattern? This ensures the wheel is seated evenly against the hub.
Step 8: Fully Lower the Vehicle and Final Tightening
Lower the car completely to the ground. Remove the jack. Now, give the lug nuts one final, firm tightening with the lug wrench, again using the star pattern. You want them snug and secure.
Step 9: Inflate the Tire
Connect your portable tire inflator to the tire valve stem and plug it into your car’s power outlet. Inflate the tire to the recommended pressure, which you can usually find on a sticker inside your driver’s side doorjamb or in your owner’s manual. Keep an eye on the tire’s shape as it inflates.
Step 10: The Cautious Drive
With the tire inflated and the lug nuts tight, you’re ready to drive. However, this is where extreme caution is needed. Drive slowly, ideally below 40 mph (60 km/h). Avoid sudden stops, sharp turns, or rough roads. Your destination should be the nearest tire shop or mechanic. Keep your hazard lights on if you feel it’s necessary for added visibility.
When Duct Tape Isn’t Enough: Limitations and Safety
While duct tape can be a lifesaver, it’s crucial to understand its limitations. This method is only suitable for:
- Small Punctures: A nail hole or a small cut.
- Sidewall Damage: Duct tape is generally not effective or safe for repairing damage to the tire’s sidewall, as this area flexes significantly and experiences high pressure.
- Temporary Fixes: To get you to a repair shop.
Never rely on duct tape for:
- High-Speed Driving: The tape can peel off or fail under stress.
- Long Distances: It’s an emergency measure only.
- Heavy Loads or Towing: The increased stress can lead to failure.
- Sidewall Repairs: This is extremely dangerous.
If your tire has a large gash, a blowout, or damage to the sidewall, duct tape will not be sufficient. In such cases, you’ll need to use your spare tire or call for roadside assistance.
According to the National Highway Traffic Safety Administration (NHTSA), proper tire maintenance and timely repairs are essential for vehicle safety. A temporary patch like duct tape should only be considered an interim solution.
Alternative Temporary Fixes and When to Call for Help
While duct tape is a surprisingly versatile tool, other options exist for temporary tire fixes:
- Tire Sealant/Inflator Cans: These aerosol cans inject a sealant and air into the tire, often sealing small punctures. They are designed for this purpose and are generally more reliable than duct tape for a quick fix.
- Spare Tire: The most common and reliable temporary solution. Ensure yours is properly inflated and you know how to change it.
When to Call for Professional Help (Roadside Assistance or Tow Truck):
- You’re in an unsafe location.
- You’re uncomfortable or unable to perform the steps safely.
- The damage is significant (large cuts, sidewall damage, blowout).
- Your spare tire is also flat or missing.
- The duct tape fix doesn’t hold air or you hear leaks.
Organizations like AAA offer roadside assistance services that can be invaluable in these situations.
Duct Tape vs. Tire Plugs: A Quick Comparison
It’s worth noting the difference between using duct tape and a proper tire plug kit. Tire plug kits are designed for repairing punctures in the tread area of a tire and are considered a more robust temporary fix than duct tape.
| Feature | Duct Tape (Temporary Emergency Fix) | Tire Plug Kit (More Robust Temporary Fix) |
|---|---|---|
| Effectiveness | Can seal small punctures, but highly dependent on application and tire condition. Not for sidewalls. | Designed to seal punctures in the tread. More reliable seal. Not for sidewalls. |
| Durability | Very limited. May last a short distance at low speeds. | Can last longer than duct tape, but still recommended for temporary use until professional repair. |
| Ease of Use | Requires careful wrapping and smoothing. | Involves reaming the hole and inserting a plug, which can be a bit messy. |
| Cost | Very low (cost of duct tape). | Low to moderate (cost of a plug kit). |
| Best For | Immediate, short-term emergency to get to safety. | Small punctures in the tread, allowing for a slightly longer drive to a shop. |
While a tire plug kit offers a better seal, duct tape is often more accessible in a true emergency if you don’t have a plug kit readily available.
Frequently Asked Questions (FAQ)
Q1: Can I drive on a tire fixed with duct tape?
You can drive on a tire temporarily fixed with duct tape, but only with extreme caution. Drive slowly (under 40 mph), avoid sudden maneuvers, and head directly to the nearest tire shop or mechanic. It is not a permanent solution and can fail if stressed.
Q2: How long will a duct tape tire fix last?
The duration of a duct tape fix is unpredictable and depends heavily on the size of the puncture, the quality of the tape, how well it was applied, and driving conditions. It’s best to assume it will only last long enough to get you to a repair facility, possibly just a few miles.
Q3: What kind of duct tape is best for a tire?
The strongest, most durable duct tape you can find is best. Look for heavy-duty, reinforced, or “gorilla” type duct tapes. These have superior adhesive properties and tensile strength compared to standard, thin duct tapes.
Q4: Can I use duct tape to fix a sidewall puncture?
No, absolutely not. Duct tape is not safe or effective for repairing sidewall damage. The sidewall flexes constantly under pressure, and duct tape will likely fail, potentially leading to a blowout. Sidewall damage requires professional repair or tire replacement.
Q5: What if the duct tape doesn’t hold air?
If the duct tape fix doesn’t hold air, or if you hear it leaking, the puncture may be too large, or the tape application wasn’t effective. In this situation, it’s best to use your spare tire if you have one, or call for roadside assistance immediately. Do not continue driving.
Q6: Should I remove the duct tape before getting a professional repair?
Yes, it’s a good idea to inform the tire technician that you’ve applied duct tape. They will likely remove it as part of their inspection and repair process. Trying to repair over the duct tape might interfere with a proper seal.
Q7: Is this method covered by any official automotive organizations?
While organizations like the Automotive.com or the Edmunds provide extensive car maintenance advice, the use of duct tape for tire repair is generally considered an unofficial, emergency roadside improvisation. Official recommendations focus on using spare tires or professional repair kits.